

Understanding Shiplap Roof- Why Re-Sheeting is Essential
When it comes to roof replacement, homeowners often grapple with the decision of whether to install new roofing materials directly over the existing deck or to re-sheet the deck first. For those with shiplap roofs, this decision becomes even more crucial due to the unique characteristics and challenges posed by this traditional roofing substrate. This comprehensive guide will delve into the reasons why re-sheathing over existing shiplap is often necessary, the history and characteristics of shiplap roofs, the benefits of proper re-sheathing, and tips for choosing the right materials and contractors for the job.
What is Shiplap?
Shiplap is a type of wooden board known for its overlapping edges, which create a tight seal between each piece. This design feature helps to prevent water infiltration and provides a sturdy surface for various applications. Traditionally, shiplap was used in both interior and exterior applications, including roofing, due to its durability and effectiveness.
Shiplap boards are typically made from fir or other softwoods, and their use was prevalent before the widespread availability of plywood. In homes built before the 1970s, shiplap was a common choice for roof decking, particularly in areas where plywood was not yet widely available or was cost-prohibitive. While shiplap has a distinct aesthetic and functional value, it presents specific challenges when modern roofing requirements come into play.
Historical Context: The Use of Shiplap in Roof Decking
Before the advent of plywood, shiplap was the primary material used for roof decks. Its use was particularly common in the Pacific Northwest, where plywood was less accessible and more expensive. Homes built between the 1920s and 1960s often featured shiplap roofs, which were constructed using 1×8 fir shiplap boards. These boards provided a solid base for the roofing materials of the time and were an affordable alternative to plywood.
The transition from shiplap to plywood began in the 1960s as plywood became more affordable and widely available. Plywood, specifically 1/2″ CDX plywood, gradually replaced shiplap due to its superior durability, ease of installation, and consistent quality. Despite this transition, many older homes still have shiplap roofs that require careful consideration and appropriate treatment when undergoing renovations or replacements.
Why Re-Sheet Over Shiplap?
Re-sheathing over shiplap is a crucial step in ensuring the durability and effectiveness of a new roof. The decision to re-sheet rather than simply overlay new roofing materials can be influenced by several factors related to the condition and characteristics of shiplap. Here are the key reasons why re-sheathing is often necessary:
- Aging and Deterioration of Shiplap: Shiplap roofs can last for several decades, but as the wood ages, it undergoes various forms of deterioration:
- Shrinkage and Cracking: As shiplap boards age, the resin within the wood dissipates, causing the boards to shrink and crack. These changes compromise the structural integrity of the roof and create potential weak points.
- Formation of Knot Holes: Over time, shiplap boards may develop knot holes, which further weaken the roof deck and increase the likelihood of water infiltration.
- Brittleness: As the wood becomes brittle, it is more prone to splitting and damage from new roofing nails. This brittleness affects the board’s ability to support new roofing materials effectively.
- Spacing and Gaps: Older shiplap roofs often develop gaps and spaces between the boards due to shrinkage and deterioration. These gaps can lead to several issues:
- Sagging Underlayment: When new roofing underlayment is applied over gaps, it can sag into the spaces, creating potential areas for water to seep through and cause damage.
- Inconsistent Surface: The uneven surface created by gaps and deteriorated shiplap can result in poor adhesion of new roofing materials, increasing the risk of leaks and other issues.
- Previous Roofing Layers: Many older homes have multiple layers of roofing installed over the original shiplap deck. This can create additional challenges:
- Nail Penetration Issues: Each layer of roofing adds more nail penetrations to the shiplap, which can cause splintering and inconsistencies in the board’s surface.
- Pattern Inconsistency: Over time, the accumulation of nails and the reduction in the board’s thickness can lead to pattern inconsistencies, affecting the ability to securely attach new roofing materials.
- Nail Penetration Issues: Installing new roofing materials over old shiplap presents specific challenges:
- Cracking and Splitting: Electro-galvanized roofing nails used in new installations can crack or split the old shiplap boards, leading to compromised integrity and potential leaks.
- Raised Nail Heads: Expansion and contraction of roofing materials can push nails upwards, causing raised nail heads that can lead to water seepage and mystery leaks.
- Unsecured Shingles: Shingles may not be properly secured if they align with cracks or gaps in the shiplap, increasing the risk of wind damage and leaks.
The Benefits of Re-Sheathing Over Shiplap
Re-sheathing over existing shiplap offers several advantages that contribute to the long-term durability and effectiveness of your new roof. Here are some key benefits:
1. Creating a Solid Substrate
Re-sheathing provides a solid and uniform substrate for new roofing materials:
- Consistent Support: A solid deck ensures consistent support for new roofing materials, reducing the risk of sagging and structural issues.
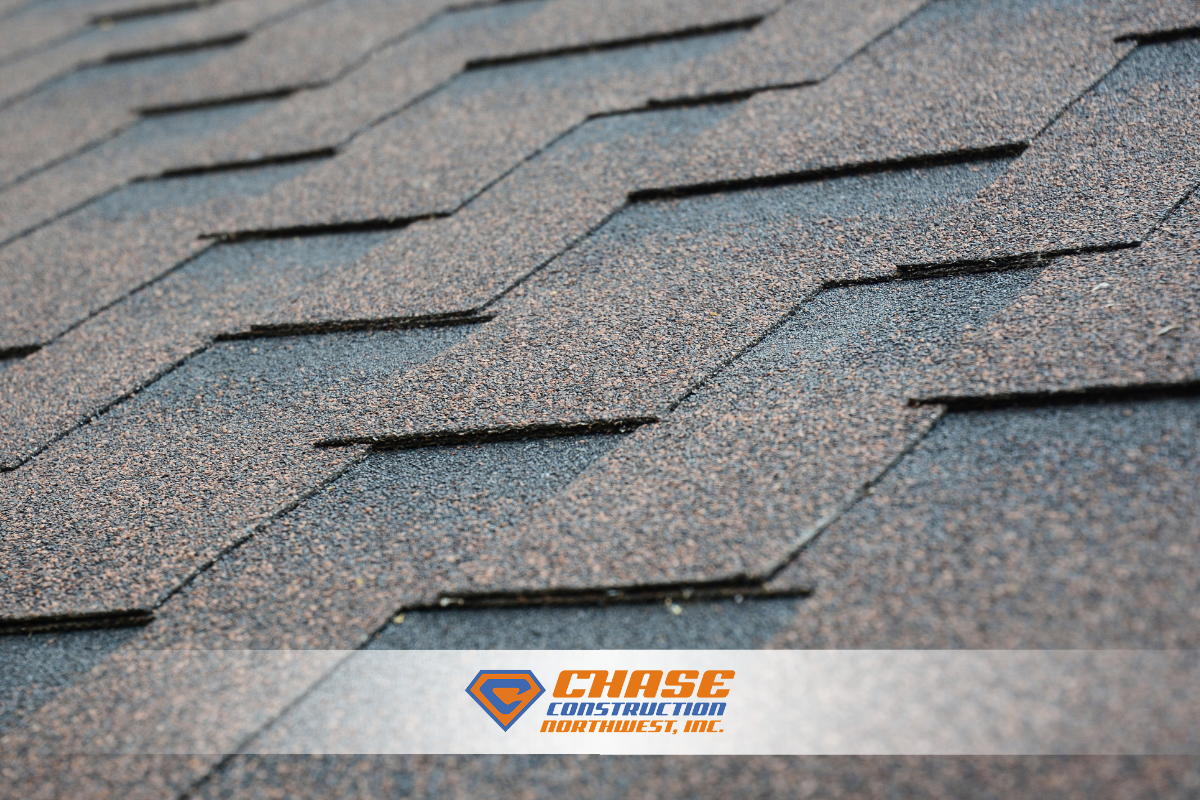
- Improved Shingle Installation: New shingles adhere more effectively to a solid substrate, ensuring a secure and reliable roofing system.
2. Preventing Leaks and Water Damage
Proper re-sheathing helps prevent water damage caused by gaps and deteriorated wood:
- Continuous Surface: A new layer of sheathing creates a continuous surface that prevents water from seeping through gaps and damaging the underlying structure.
- Reduced Risk of Leaks: By addressing potential issues with the old shiplap, re-sheathing minimizes the risk of leaks and water damage in the new roofing system.
3. Extending Roof Lifespan
Re-sheathing helps extend the lifespan of your new roof by providing a stable and reliable base:
- Enhanced Durability: A solid substrate reduces the risk of damage and ensures the longevity of your new roofing materials.
- Long-Term Performance: Proper re-sheathing ensures that your new roof performs well over its expected lifespan, reducing the need for frequent repairs or replacements.
4. Avoiding Costly Repairs
Investing in proper re-sheathing can save you from expensive repairs and maintenance:
- Prevention of Future Issues: By addressing potential problems with the old shiplap, you can avoid costly repairs and maintenance associated with leaks and structural damage.
- Long-Term Savings: Proper re-sheathing reduces the likelihood of unexpected issues, saving you money in the long run.
Recommended Materials for Re-Sheathing
Choosing the right materials for re-sheathing is crucial for ensuring the durability and effectiveness of your new roof. Here are some recommended materials:
- 7/16″ OSB (Oriented Strand Board): OSB is a cost-effective option that provides a solid and stable base for new roofing materials. It offers good strength and durability.
- 3/8″ OSB: Slightly thinner than 7/16″ OSB, this option still provides reliable support and is suitable for many roofing applications.
- 1/2″ CDX Plywood: CDX plywood is a higher-grade material that offers excellent durability and support for roofing systems. It is more resistant to moisture and provides a strong base for new shingles.
Installing a New Roof
Once the decision is made to re-sheet over shiplap, the installation of a new roof involves several critical steps:
1. Inspection and Preparation
Before installation begins, a thorough inspection of the existing shiplap and preparation of the surface is essential:
- Inspect Shiplap Condition: Assess the condition of the existing shiplap to identify any areas that may need additional repair or reinforcement.
- Remove Old Roofing Materials: If applicable, remove old roofing materials and any debris from the roof surface to ensure a clean and solid base for the new sheathing.
2. Re-Sheathing
With the old roofing materials removed and the surface prepared, the next step is to install the new sheathing:
- Apply Sheathing Material: Install the chosen sheathing material (OSB or plywood) over the existing shiplap. Ensure that the sheathing is properly aligned and secured.
- Secure Sheathing: Use appropriate fasteners to secure the sheathing to the existing shiplap, ensuring a solid and stable base for the new roofing materials.
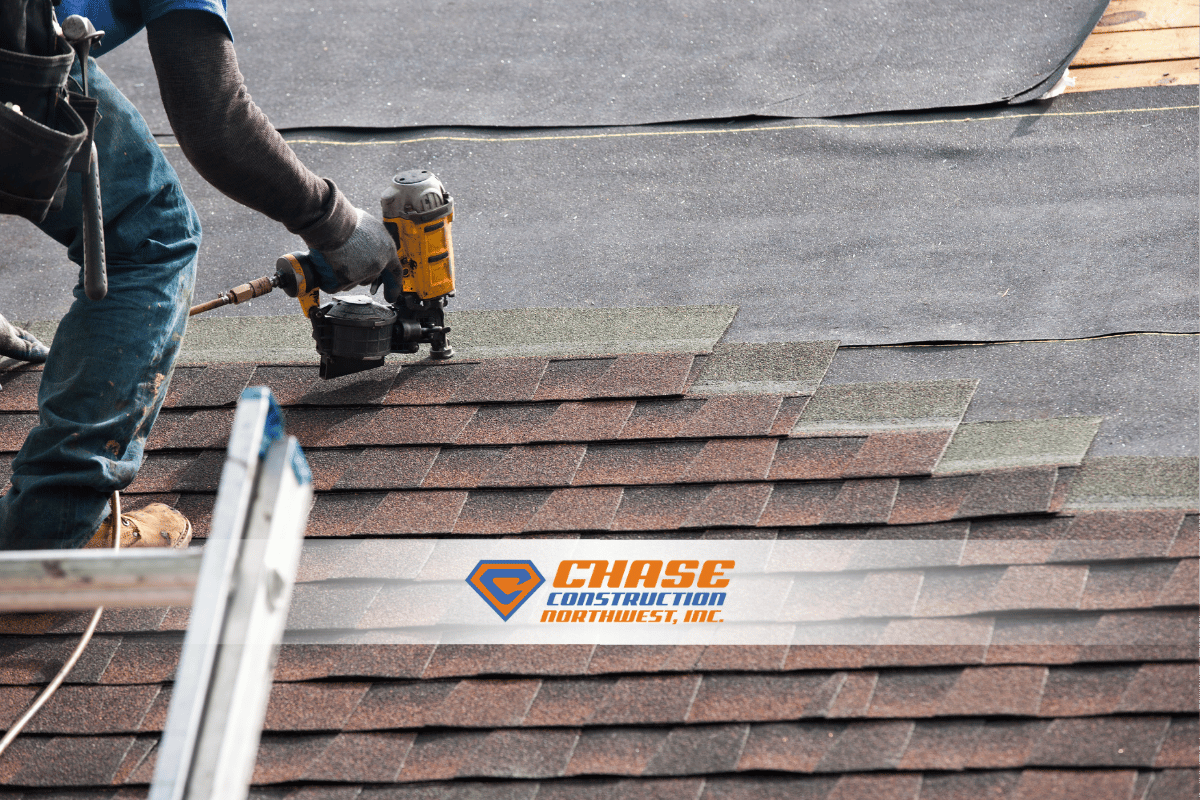
3. Roof Installation
After re-sheathing, the installation of new roofing materials can proceed:
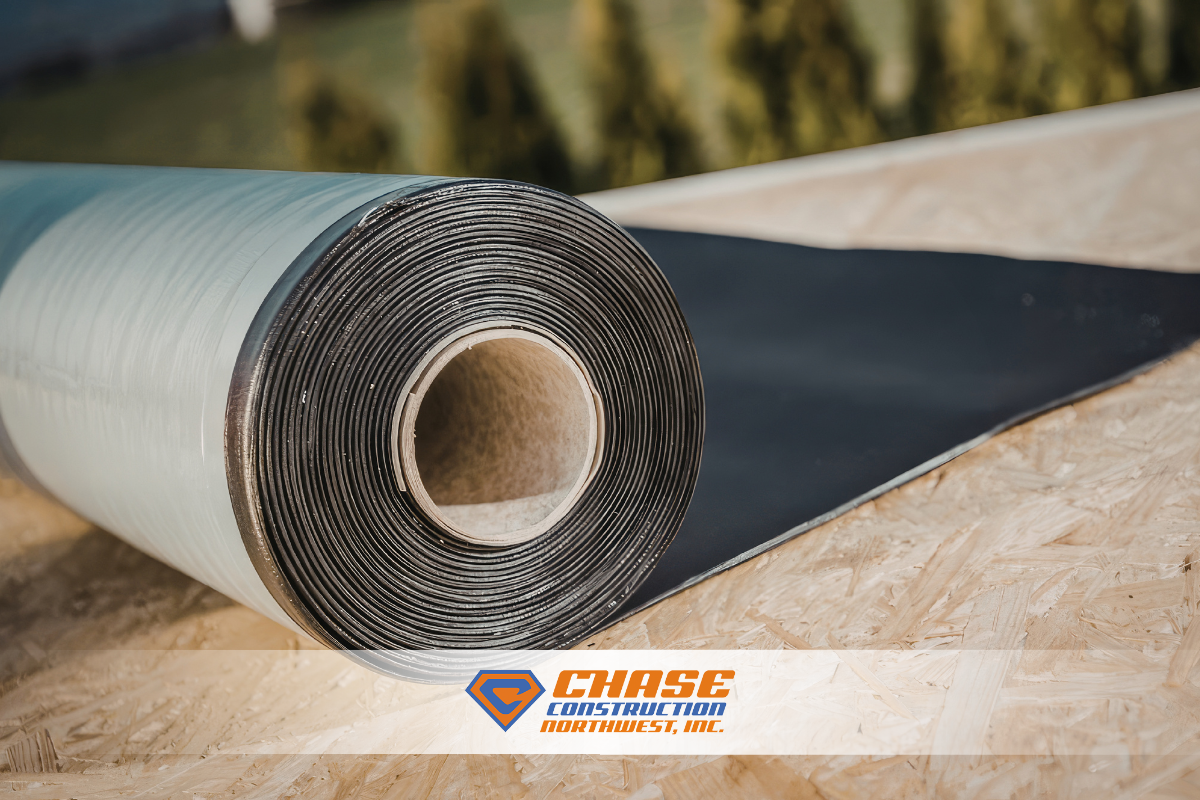
- Install Underlayment: Apply roofing underlayment over the new sheathing to provide an additional layer of protection against moisture.
- Lay Shingles: Install new shingles according to manufacturer specifications, ensuring proper alignment and secure fastening.
- Complete Roofing Accessories: Install any additional roofing accessories, such as ridge vents, flashing, and gutter components, to complete the roofing system.
Choosing the Right Roofing Contractor
Selecting a reputable and experienced roofing contractor is essential for ensuring a successful re-sheathing project. Here are some tips for finding the right contractor:
1. Look for Experience and Expertise
Choose a contractor with extensive experience in handling shiplap roofs and re-sheathing projects. An experienced contractor will have the knowledge and skills needed to address the specific requirements of re-sheathing over shiplap. An experienced contractor will have a deep understanding of the challenges involved and the best practices for ensuring a high-quality installation. Look for a contractor with a proven track record in similar projects, and ask for references or examples of their previous work.
2. Verify Licensing and Insurance
Ensure that the contractor is properly licensed and insured. Licensing indicates that the contractor meets local and state regulations and has the necessary qualifications for roofing work. Insurance protects you from liability in case of accidents or damage during the project. Verify these credentials and request proof of insurance before hiring a contractor.
3. Get Multiple Quotes
Obtain detailed quotes from several contractors to compare prices and services. A comprehensive quote should include the cost of materials, labor, and any additional fees or charges. Be wary of quotes that seem unusually low, as they may indicate subpar materials or workmanship. A well-detailed quote will help you understand the scope of the project and ensure transparency in pricing.
4. Check Reviews and Ratings
Research the contractor’s reputation by checking online reviews and ratings. Websites like Yelp, Angie’s List, and Google Reviews can provide valuable insights into the contractor’s performance and customer satisfaction. Pay attention to both positive and negative reviews, and consider reaching out to past clients for direct feedback.
5. Review the Contract
Before signing any agreement, carefully review the contract to ensure that all aspects of the project are covered. The contract should detail the scope of work, materials used, timeline, payment schedule, and warranty information. Make sure you understand all terms and conditions, and ask for clarification on any points that are unclear.
Understanding the Costs Involved
The cost of re-sheathing over shiplap can vary depending on several factors:
1. Material Costs
The cost of sheathing materials such as OSB or plywood will be a significant portion of the total cost. OSB is generally more affordable than plywood, but plywood offers superior durability and moisture resistance. Prices for these materials can fluctuate based on market conditions and availability.
2. Labor Costs
Labor costs will vary based on the complexity of the project, the experience of the contractor, and regional labor rates. Re-sheathing over shiplap requires additional labor compared to standard roof replacement, as it involves installing a new layer of sheathing over the existing deck.
3. Additional Costs
Other costs to consider include the removal of old roofing materials, disposal fees, and any necessary repairs to the existing ship lap. Additionally, costs for new roofing materials, underlayment, and roofing accessories will be factored into the overall price.
Benefits of Re-Sheathing Over Shiplap
Investing in re-sheathing over shiplap offers several long-term benefits:
1. Improved Roof Performance
Re-sheathing ensures a stable and consistent base for new roofing materials, leading to improved performance and longevity of the roof. A well-prepared substrate reduces the risk of leaks, sagging, and other issues that can affect the roof’s effectiveness.
2. Enhanced Energy Efficiency
A properly installed roof with a solid substrate can contribute to better energy efficiency in your home. Reduced air leaks and improved insulation can help maintain consistent indoor temperatures and lower energy bills.
3. Increased Property Value
A new roof with proper re-sheathing can enhance the overall value of your property. Potential buyers appreciate the assurance of a well-maintained roof and the longevity it provides, making your home more attractive in the real estate market.
4. Peace of Mind
Re-sheathing over shiplap provides peace of mind by addressing potential issues with the old deck and ensuring a reliable and durable roofing system. Knowing that your roof is properly installed and protected allows you to enjoy your home with confidence.
Contact Expert Roofers
Re-sheathing over shiplap is an essential step in the roof replacement process, particularly for homes with older shiplap decks. The unique characteristics of shiplap, including its susceptibility to aging, gaps, and nail penetration issues, make re-sheathing a crucial measure for ensuring the durability and effectiveness of a new roof. By choosing the right materials, hiring a reputable contractor, and understanding the costs involved, homeowners can achieve a high-quality roofing system that provides long-term protection and value.
Investing in proper re-sheathing not only improves the performance of your new roof but also contributes to energy efficiency, increased property value, and peace of mind. Whether you’re dealing with a historic home or a modern renovation, understanding the importance of re-sheathing over shiplap will help you make informed decisions and ensure a successful roofing project.
Are you ready to improve your home’s ventilation and protect your investment with a smart vent roof system? Our team of experts at Chase Construction North West, Inc. is here to help. With years of experience and a commitment to quality, we provide professional installation and maintenance services to ensure your home remains comfortable, energy-efficient, and protected from the elements.
Contact Information:
- Address: 11316 36th St E, Edgewood, WA 98372
- Email: info@chasenw.com
- Main Office: (253) 445-8950
Sales Team:
- Gary Sparks: (253) 656-8375
Operations Manager:
- Chase Beattie: (253) 200-7966
Connect With Us
Contact Chase Construction Northwest Inc. today for a free, no-obligation estimate. Our team is committed to providing exceptional service and quality craftsmanship to meet your roofing needs. Whether you have questions or are ready to start your roofing project, we’re here to help. Reach out to us at (253) 445-8950 or email us at info@chasenw.com.


5 thoughts on “What is a Shiplap Roof?”
Most cost effective substrate for 10/12 over shiplap that still has tar stuck to shiplap
Insurance company is refusing to pay for sheeting over shiplap how do I get them to pay?
Brett,
Have your roofing company explain in detail how installing new shingles over shiplap is not feasible.
What if I have a contract that says it will ‘repair or replace’ existing sheathing that is ‘damaged or rotted’, but instead they are going to install new sheathing over the whole roof, right over the ship lap as described in this article.
In my opinion this is not repair or replacing, and I would dispute that it is damaged and is certainly not rotted. Therefore, doesn’t the contract need to be rewritten to address ‘resheathing’? And if it does not, it sounds like the contract does not give them the authority or direction to proceed with resheathing.
If you have shiplap now and they know that, and their intention is to resheet over it, you can ask them to put that in the contract in direct terms with the total price to resheet. They may have a different line that addresses repair/replace of rotted shiplap in that case, and it’s always something that needs to be found after the tear-off portion of the job.